I'm a serial house-stalker, and never ever tire of an excellent home trip or an in the past and after restoration. I'm a company follower in restyling, refreshing and renewing things in your house to make it your own - without breaking the spending plan. what kind of paint to use on cabinets. I'll show you how!.
Okay I require to start this post with a really clear caution: We, and cabinets (white painted kitchen cabinets). Ahhh that feels much better to get that exposed first thing. Okay, so the reason that is the very first thing in bold red text, is because I know I am going to get remarks "Why do not you just paint your cabinets?" BUT our us not to paint because we decided to rent our house and not sell it.
AND we just had 4 weeks to finish our whole home, there technically anyway. Because I include a lot of painted cooking area remodels, I get a Great Deal Of comments about how individuals can't paint their cabinets, generally a partner is not fine with painting for one factor or another. So this post will ideally reveal you that 1 x 6 Oak, or matching lumber in needed length (see diagram listed below) Oak Crown Molding (we used vinyl composite oak look moldings) Pine 5/16 half round molding, very same length as header plus an inch or 2.
The 8-Minute Rule for 20 Surprising Tips On How To Paint or Stain great post to read Kitchen Cabinets - Residential Painting.Contractors - 704-931-8438
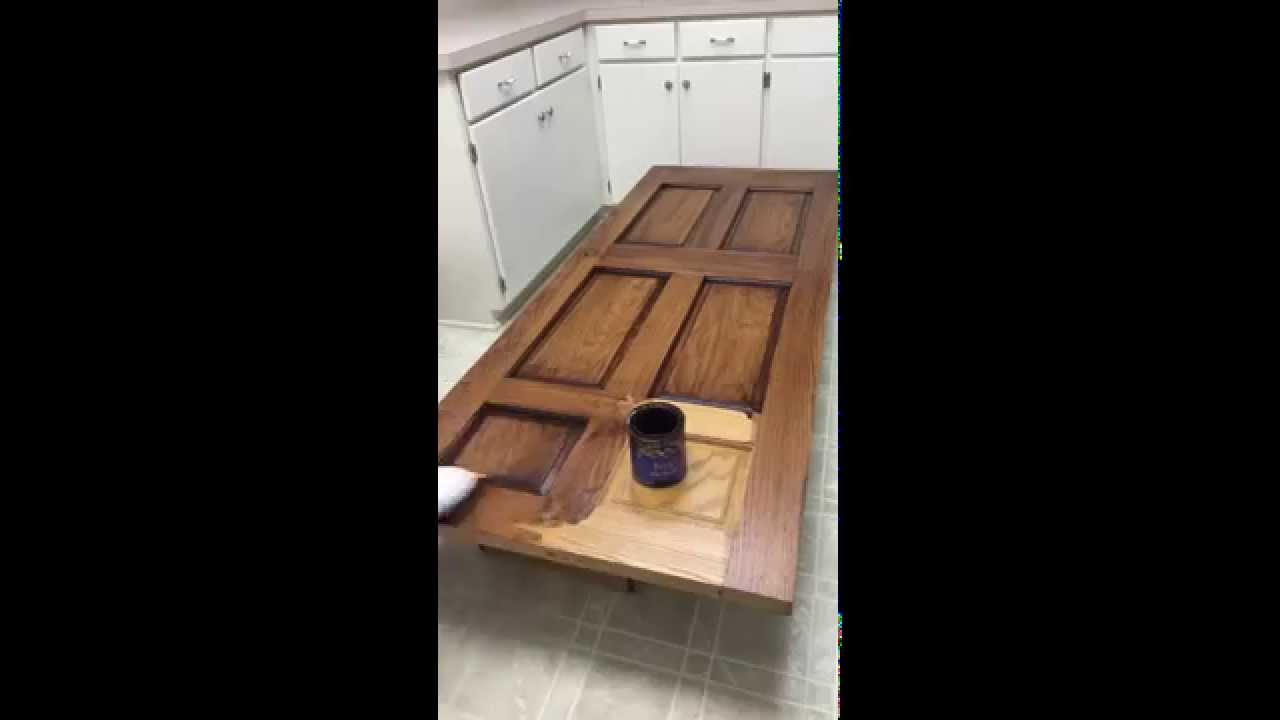
Take your oak 1 x 6, small pine molding and crown (ONLY if genuine wood) stain them to match the color of your cabinets. It is an excellent concept to utilize a little test piece to see if you need one or 2 coats of stain, examine it against your kitchen in the real space, to make sure it looks right.
Spray( or brush) with Polyurethane and permit them to dry - paint colors that go with oak cabinets. Gently sand with 250 grit or greater sandpaper and clean dust away with a tack fabric prior to you apply a second coat. (You can decide if you need a 3rd coat, a light sanding between coats is a great idea for a professional finish). Once they are stained, lacquered and totally dry, cut them to the length of the cabinets.
Measurements you will require, the front length of your cabinets (measurement 1 and 3) and you need the go back to the wall measurement (4 and 2) It is most convenient to protect the molding corners prior to installing them above your head. Place your wood on a level surface. Then glue and nail the mitered corner of the header together, make sure to keep the corner square.
Top Guidelines Of How To Redo A Fake Wood Cabinet Surface - Home Guides ...
Try to position any scarf joints in unnoticeable locations. I did my own as near the wall, above the fridge, to avoid it being noticeable. Once it is put and cut, glue and nail the joint together. Clean away any excess glue with a damp rag. Enable glue to dry.

Set them back the exact same thickness of your wood on the ends of your "L" shaded header space. paint colors for kitchens with golden oak cabinets. Ensure the cleats are level up and down the exact same as your cabinets. (Sorry the picture is fuzzy, it is the only one I took! UGH!! So, I produced an area image to offer you an idea of where these pieces go, listed below) Location the header on top of your cabinet.
Prior to tightening the clamps, make certain that you line up the front of the header precisely with the front and side of your cabinet, then tighten up clamps to hold the header in place. Pre-drill holes for screws to avoid spiting wood or breaking drill bits. With the door of your cabinet open, pre-drill a hole directly through the face frame of your cabinet into the header piece.
The Best Guide To How To Upgrade A Boring Builder Grade Bathroom
Repeat the pre-drill, screw process about every 3 feet, down the length of your cabinets, or where it appears necessary. Now that the header is secured to the cabinet body, nail the ends to the cleats near the top of the header. (We nailed where we understood the crown would cover so that no holes were visible) This is what they will look like with the headers set up: Cover the space between the cabinet with the little pine molding, (sorry I forgot a photo of this, but the example listed below from our tutorial on how to raise a brief vanity tutorial in our mater bathroom is the exact same, except we painted rather of staining).
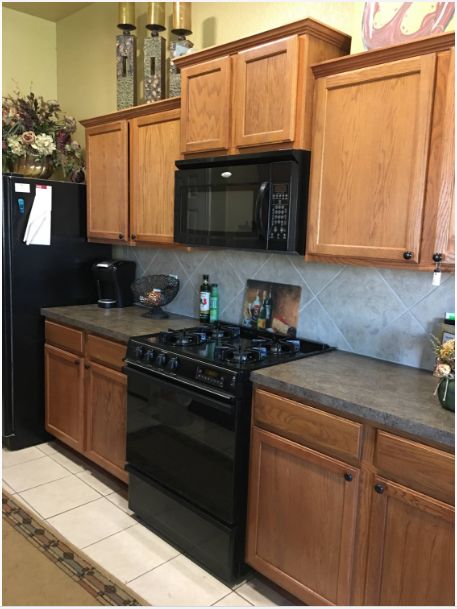
We could not find any strong wood oak molding at any local home stores, or perhaps lumber stores. It was just offered for unique order, but we didn't have time to wait. So we utilized a vinyl composite type molding with a finished "oak appearance" readily available and Lowes and The Home Depot.
You can reach out to 704-931-8438 to receive a proposal to paint your old cabinets.
You are welcomed to call 704-931-8438 to receive a proposal to paint your cabinets.